This is Italeri’s Westland Wessex HAS.3 that I’ve built while we’ve been locked down due to the Covid-19 pandemic. I’ve been spending much more time than usual in the shed, but finding it difficult to find any motivation to build anything. Whilst flicking through Twitter today I came across some posts by @WarDiaryF82. The posts are in the from of a running commentary of the events of this day’s date in 1982 in the South Atlantic. They referred to the dramatic insertion and eventual rescue of members of the SAS by HMS Antrim’s Wessex helicopters on South Georgia at the beginning of the conflict.
One of the correspondents was Chris Parry (@DrChrisParry), a name I instantly recognised as author of one of my favourite Falklands books – Down South. Chris was a member of the crew of XP142, which eventually rescued the SAS troops and the crew of the two Wessex that had crashed on the glacier. (Cramming 16 men in to the Wessex, the crew flew the severely overloaded helicopter back to the safety of Antrim. Every time I read the story I marvel that no-one was killed or severely injured.)
Anyway, inspiration struck, and knowing I had Italeri’s kit in the stash, earmarked for building ‘Humphrey’, I’ve swept the bench and am making a start. First up will be to gather references, and see if I can tie down Humphrey’s markings as they were on the morning of the rescue. Then see what needs (or is worth) correcting on the kit parts. Italeri’s Wessex moulds are fairly new, but are not without inaccuracies or compromises.
Here are the main plastic parts.


The kit contains some nice PE brass parts, and I’ve got Royale Resin’s excellent wheel set to add.

And the decal sheet.

Since the last entry I’ve received some goodies to enhance the model, and some references. I really like the Haynes ‘manuals’. I had one of the ‘proper’ ones for my Mini many years ago, and whoever came up with the idea of doing things other than cars at Haynes is a genius of marketing.

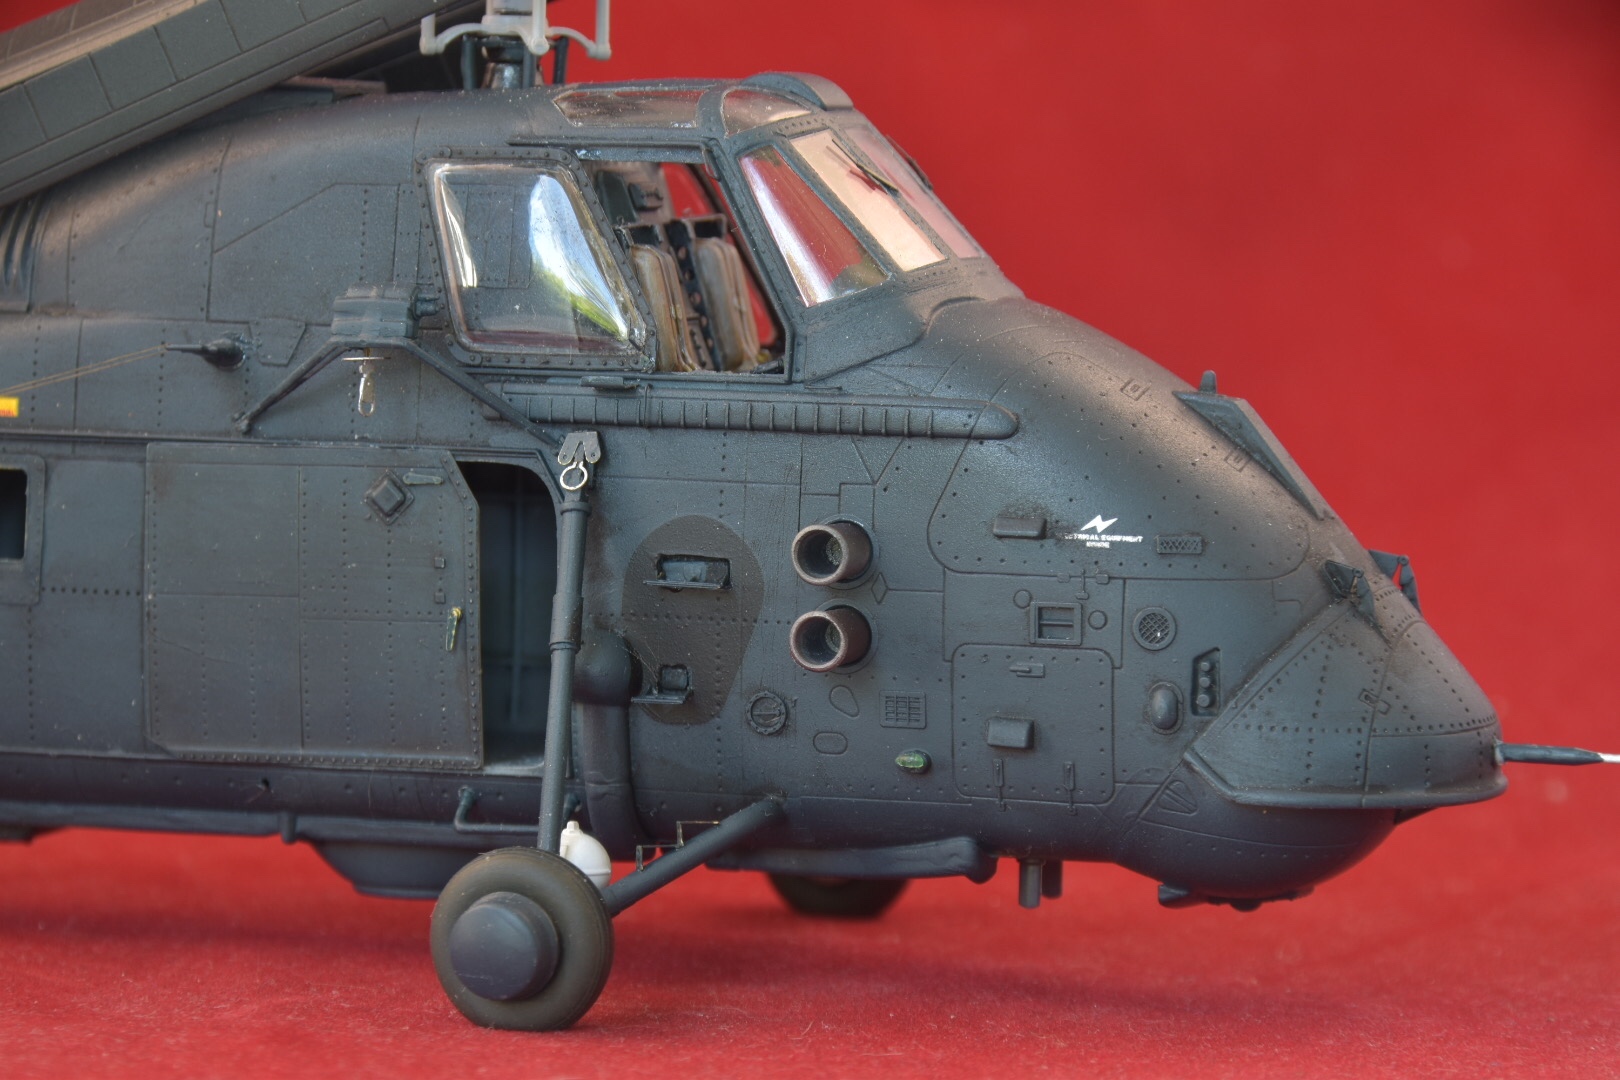
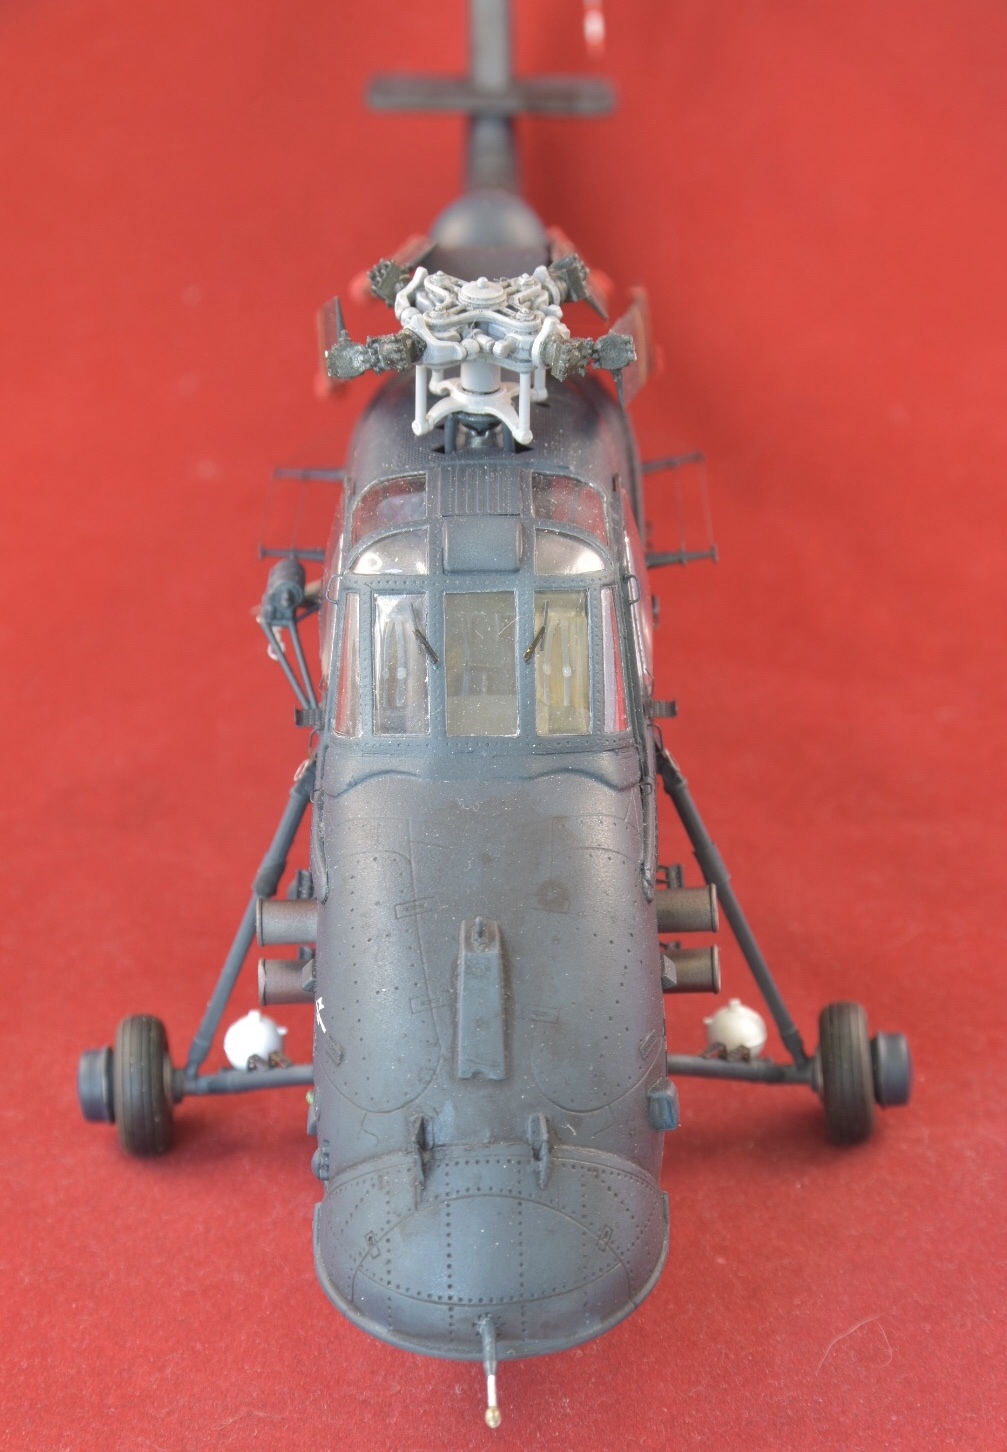
I’ve also got the Eduard HU.5 exterior PE brass set. Not all parts are relevant to a HAS.3 but there’s a lot that can be used. I’d really ahve liked the HAS.3 interior set, but it’s out of production and very expensive on eBay. I’ll have to stick to the HU.5 intrument panel Italeri provide. I’ve already been working with this, and it does add some nice detail, especially around the tail fin.


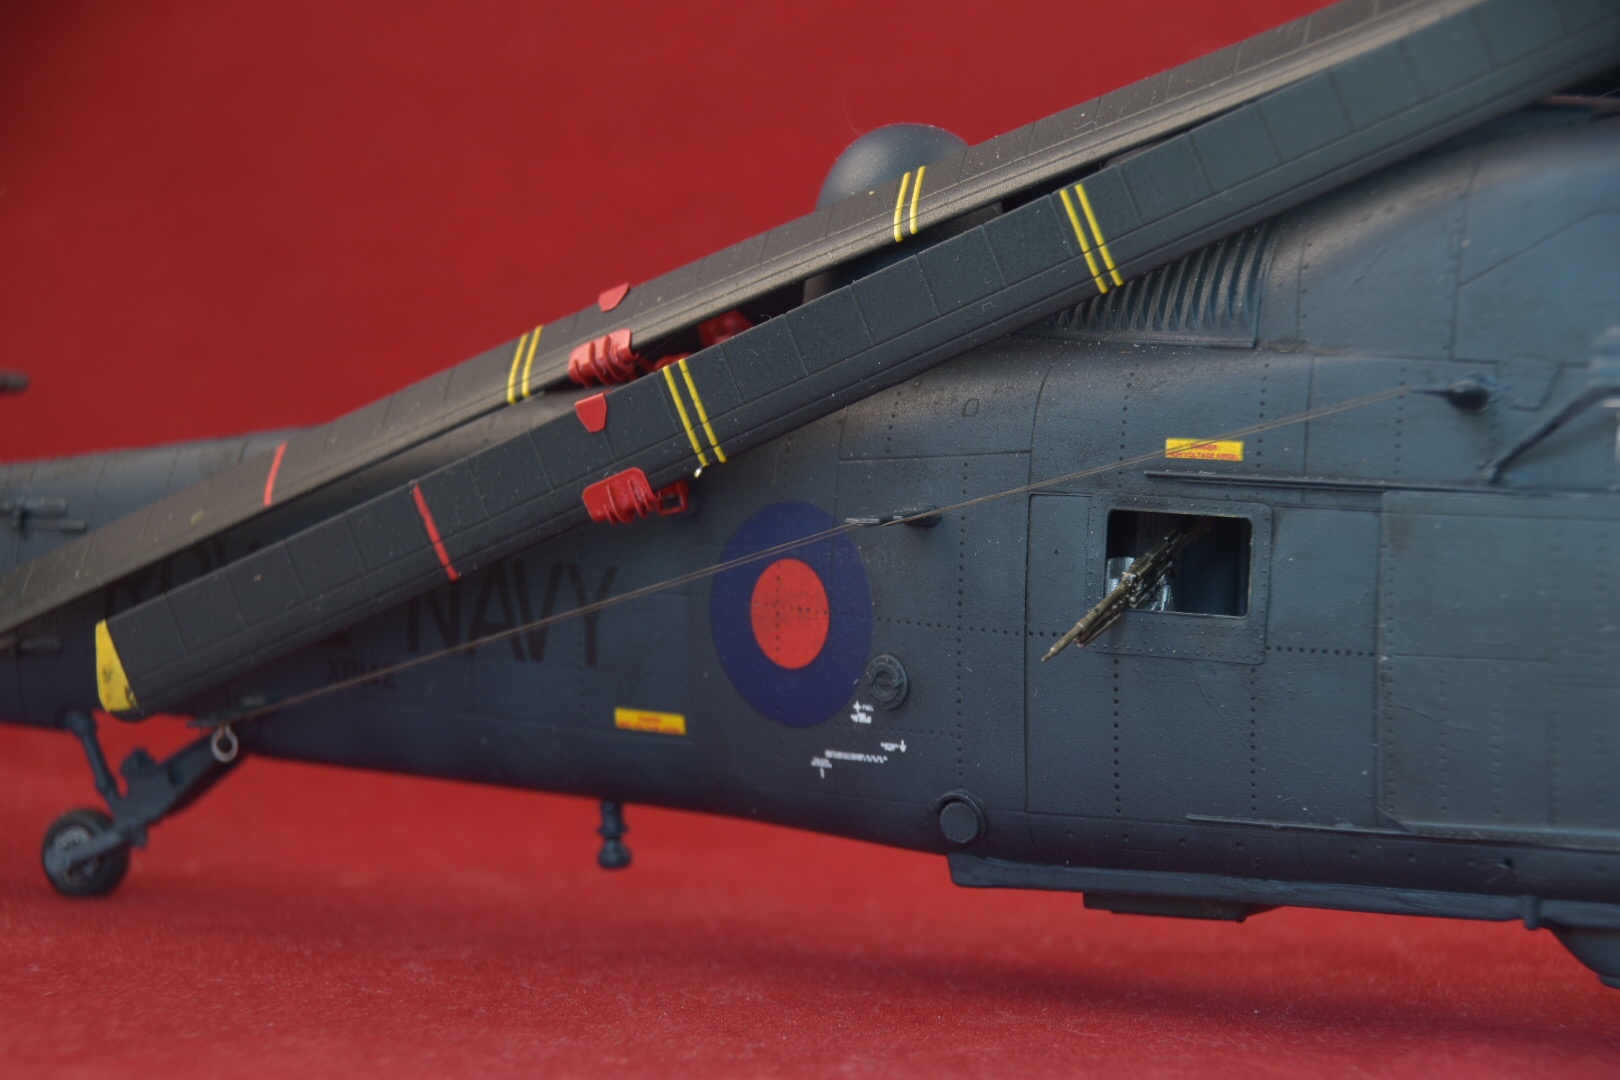
The mesh over the cooling holes for the tail rotor transmission is particularly nice, and there are more to add at the tip of the fin when the two halve of the fuselage are mated together.
The other work has been on the interior. I drilled out the lightening holess on the seat frames, and added a representation of the sheep skin seat covers. The cabin only got some cursory weathering as the main door will be closed to hide the lack of sonar and radar kit.


I’ve also got the mesh in the engine air intake, and only super glued to parts to my fingers once!

A good day in the shed today. Here’s Humphrey with all the PE added, and a little filler before being sanded back. I have to say that the Italeri Wessex is pleasant surprise in terms of fit. Really nicely done in places, with some lovely surface detail.

A shot of how much the PE is bringing to this model. PE stuff is sometimes a bit thick and heavy, but the Wessex is such a pimply, gnarled aircraft it just works really well.

With all the PE in place I could start to make the main paint scheme. I don’t know if pre-shading is in or out of fashion these days, but I still like it. Here’s a patchy, scruffy Humphrey ready for RAF Blue Grey to go over it,.

And now with Hataka RAF Blue Grey on. I simply can’t get on with Hataka paints, but as I had the correct colour on the shelf I had yet another go. Using a 0.3mm nozzle on the airbrush it was a passable experience, but still a ball-ache. The colour match is spot on though, so swings and roundabouts!

I think Chris Parry is following this build, so I hope it’s up to snuff.
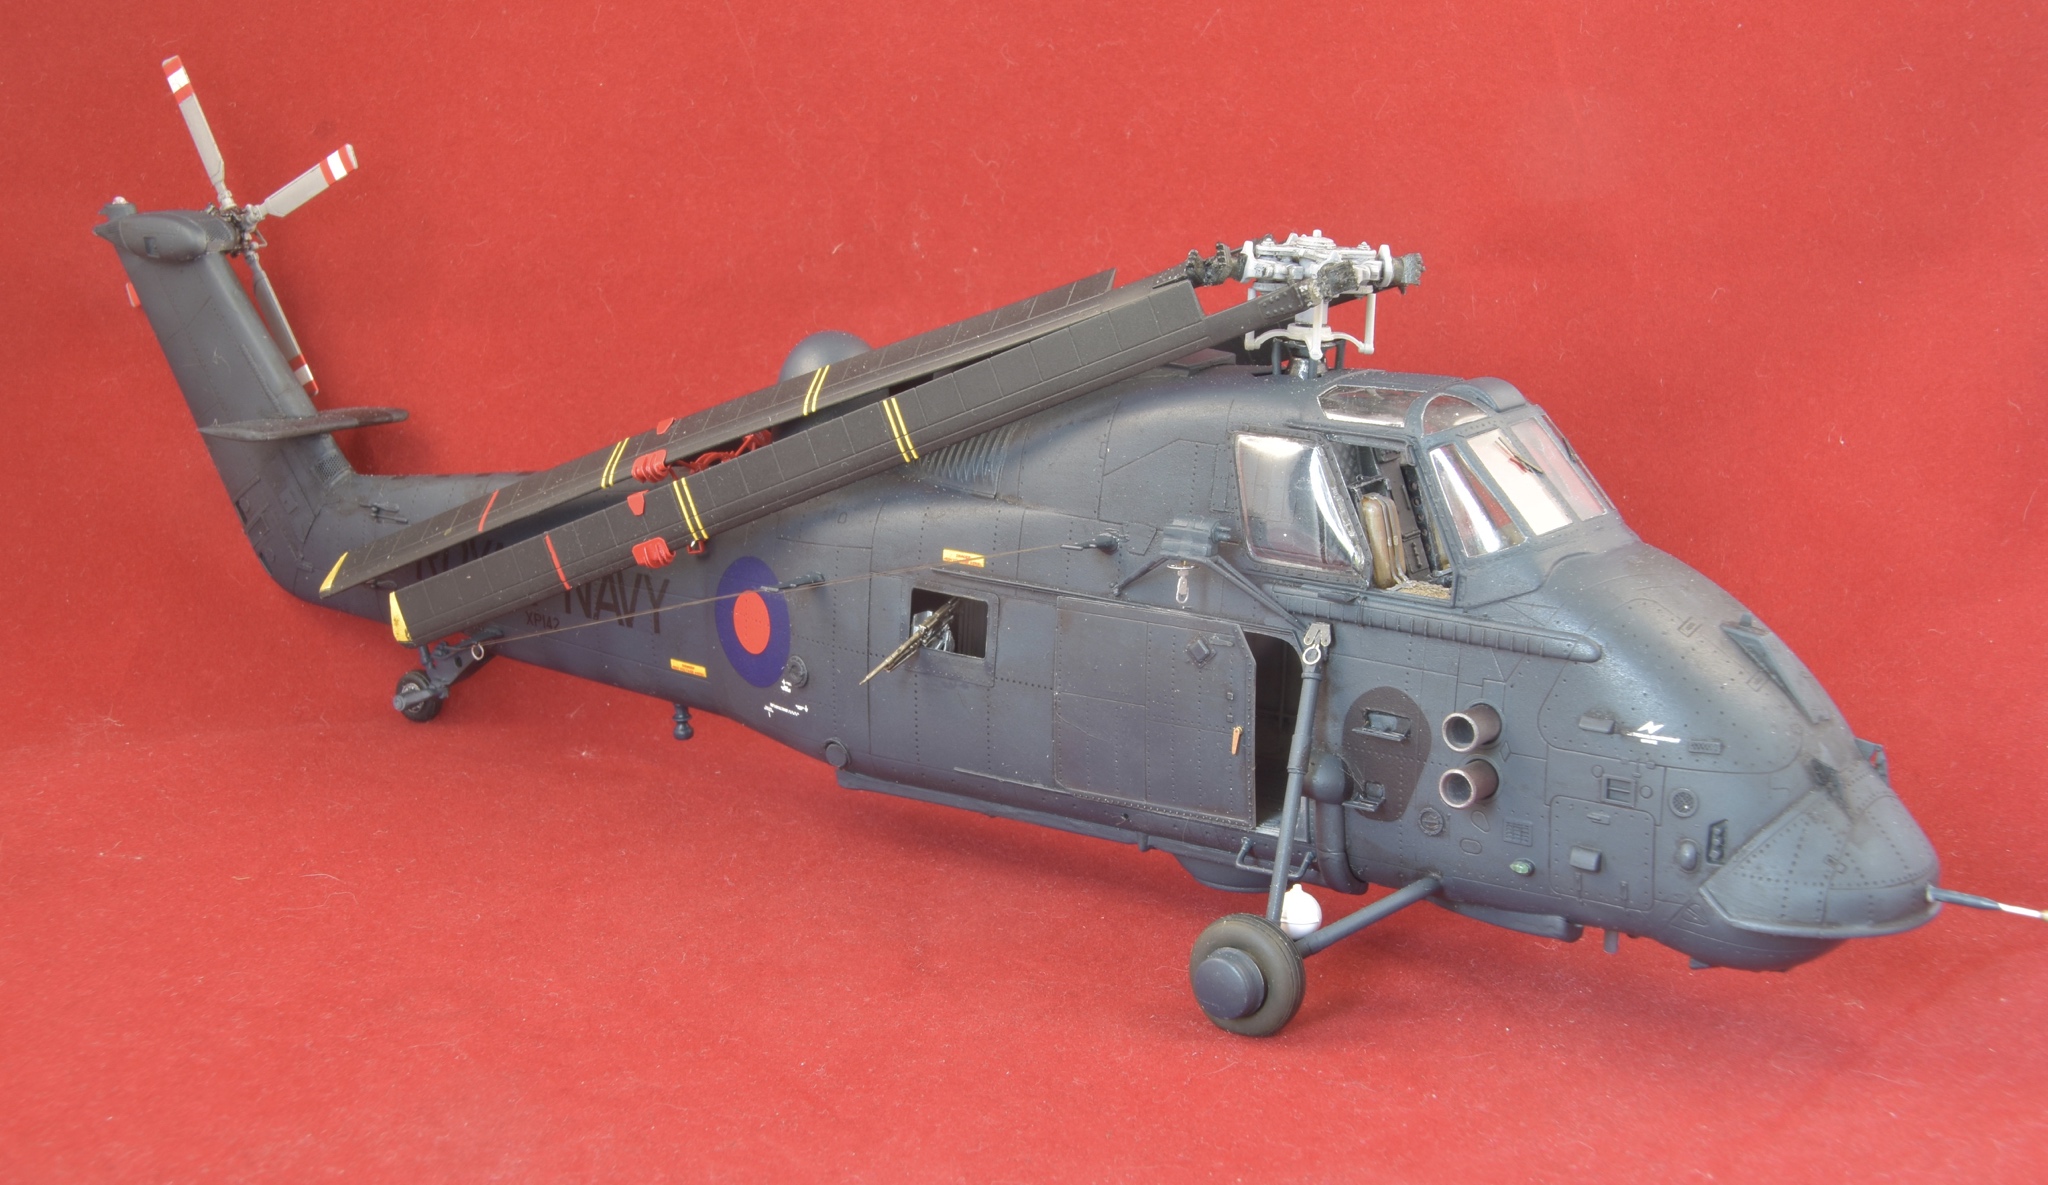
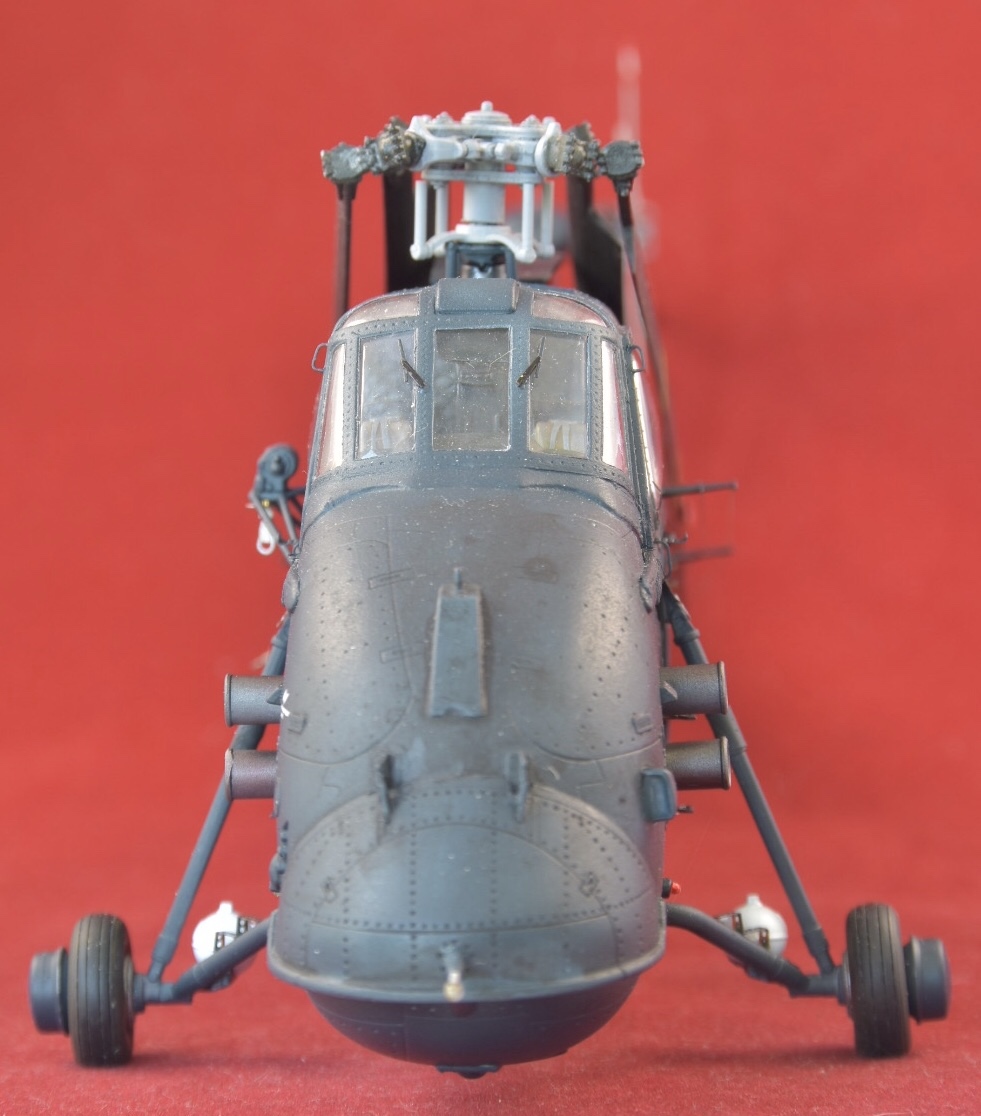
Lots of work on Humphrey over the last week. The decals are complete, and it has wheels. I’ve been spending a very hot day in the shed adding umpteen photo etch brass details to the exterior. There’s tie down hooks, handles, handholds, the winch hook, and some lovely steps on the side for the cockpit crew to ascend to the cockpit. PE is not difficult to work with, but by it’s nature can make some very fine, minute parts, that require a steady hand, patience, and a good magnifying visor. I’ll have to go round and paint these all in the correct colours next. I’m also really pleased with the replacement parts for the mesh over the ventilation holes for the tail rotor transmission gear boxes. (Bottom picture.)


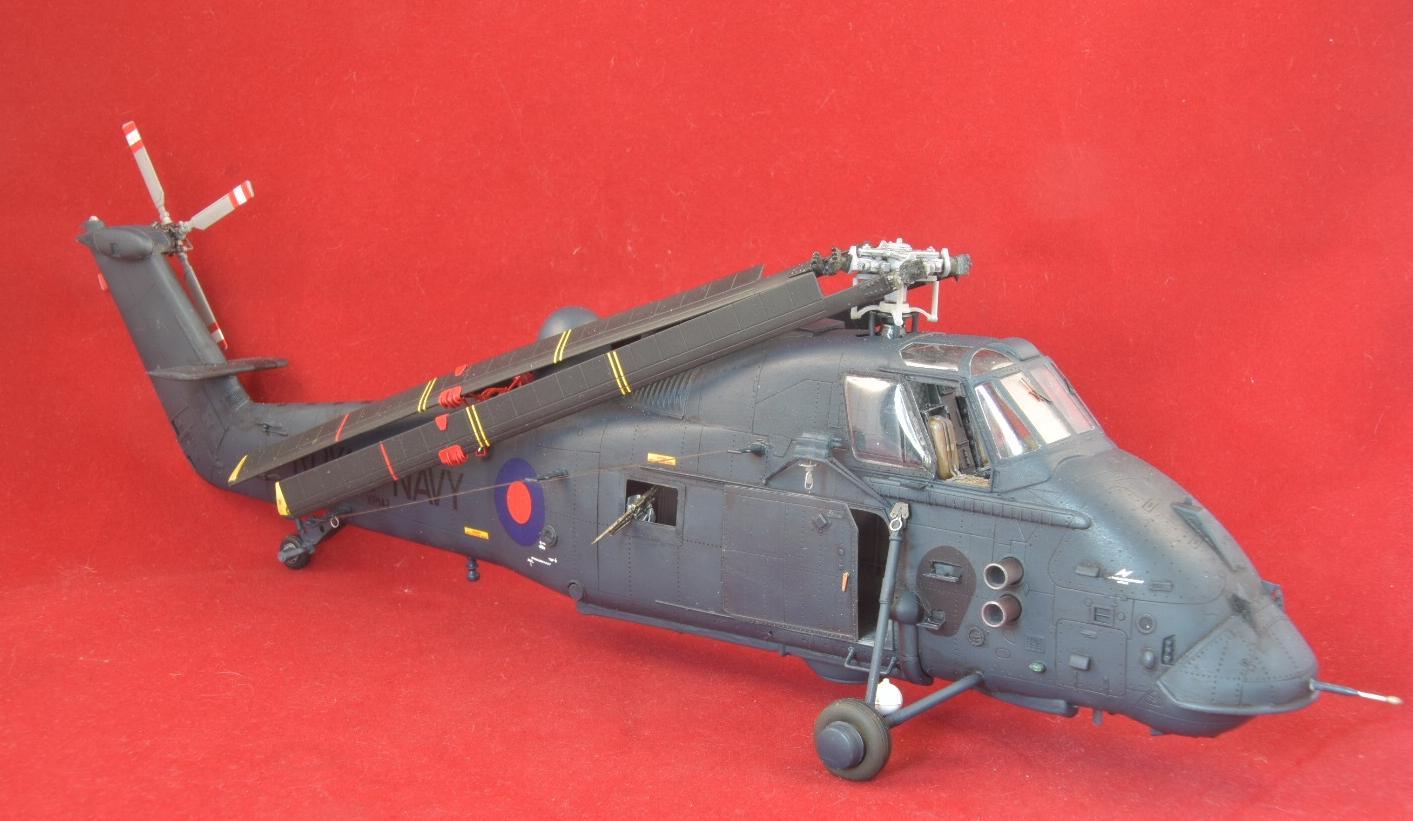
Humphrey is finished. Here are some more pictures showing the extra detail of the photo etched brass parts, and Scale Warship’s rotor fold.